A sourdough starter is a natural mixture of wild yeast and bacteria, created through fermentation of flour and water. It’s essential for bread to rise without commercial yeast and serves as the foundation for authentic sourdough bread baking, offering a gateway to traditional bread-making methods.
What is a Sourdough Starter?
A sourdough starter is a natural mixture of wild yeast and bacteria that ferments to create a bubbly, active leavening agent. It’s made by combining flour and water, which attracts wild yeast and bacteria present in the air and on the flour. Over time, this mixture ferments, producing lactic acid and carbon dioxide, giving sourdough bread its characteristic tang and rise. Unlike commercial yeast, a sourdough starter is a living, breathing ecosystem that requires regular feeding and care. It’s a versatile tool for bakers, enabling the creation of authentic sourdough bread, pancakes, and other treats. With proper maintenance, a sourdough starter can be used repeatedly, becoming stronger and more flavorful over time.
Why Create a Sourdough Starter?
Creating a sourdough starter offers a unique and rewarding baking experience, allowing you to harness the power of natural yeast and bacteria. It provides a healthier alternative to commercial yeast, as the fermentation process breaks down gluten and creates beneficial acids, making bread easier to digest. A sourdough starter is also cost-effective, requiring only flour and water to maintain. Additionally, it promotes sustainability, as you can reuse and refresh it indefinitely. Beyond practicality, nurturing a sourdough starter connects you to centuries of traditional bread-making practices. It’s a fun and educational project that enhances your baking skills and opens the door to crafting delicious, authentic sourdough bread and other treats. With patience and care, your starter becomes a trusted companion in the kitchen.
Creating Your Sourdough Starter
A sourdough starter is crafted using just flour and water, relying on wild yeast and bacteria for fermentation. This simple, rewarding process kickstarts traditional bread-making.
Ingredients Needed
To create a sourdough starter, you’ll need just two simple ingredients: flour and water. Use a combination of 50% whole wheat or rye flour and 50% all-purpose or bread flour for optimal results. Whole wheat or rye flour is recommended initially as it contains more beneficial microbes. Use filtered or tap water, avoiding chlorinated water if possible. These ingredients provide the foundation for fermentation, allowing wild yeast and bacteria to thrive. Keep extra flour and water on hand for regular feedings to maintain and strengthen your starter. Ensure all tools and containers are clean to prevent contamination. This minimal setup makes sourdough starter creation accessible and straightforward for anyone eager to begin their bread-making journey. Quality of ingredients directly impacts the starter’s health, so choose fresh, unbleached flours for the best outcome.
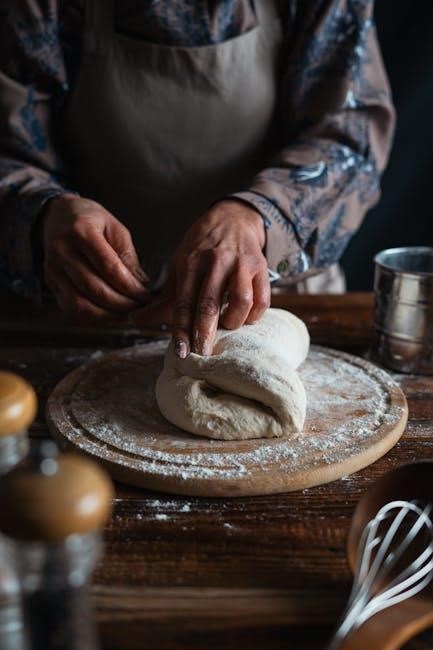
Step-by-Step Creation Process
Creating a sourdough starter is a simple, 7-10 day process. Begin by mixing equal parts of flour and water in a clean container. Discard half the starter daily and feed it fresh flour and water to encourage microbial growth. Store it in a warm, draft-free place to promote fermentation. After 7-10 days, your starter should be bubbly, active, and nearly double in size after feedings. Once it reaches this stage, it’s ready to use in recipes. Consistency and patience are key, as the starter develops its own rhythm over time. This process lays the foundation for baking delicious sourdough bread and other treats, making it a rewarding journey for any home baker.
Day 1: Initial Setup
Begin by mixing equal parts of flour and water in a clean, non-reactive container. Use a glass or ceramic vessel, as metal can interfere with the fermentation process. Combine 1/2 cup (100g) of flour with 1/2 cup (100g) of water at room temperature. Stir thoroughly to ensure all ingredients are well incorporated. Cover the container loosely with a cloth or plastic wrap to allow airflow while keeping dust out. Place the mixture in a warm, draft-free spot, ideally at 75°F to 78°F (24°C to 25°C), to encourage the growth of wild yeast and bacteria. Let it rest undisturbed for 24 to 48 hours. This initial step kickstarts the fermentation process, laying the groundwork for your sourdough starter to develop over the next few days.
Feeding Schedule: Days 2-7
Following the initial setup, your sourdough starter requires daily feeding to thrive. Each morning, discard half of the starter and add equal parts of flour and water (e.g., 1/2 cup flour and 1/2 cup water). This routine helps maintain a healthy balance of yeast and bacteria. Keep the starter in a warm, draft-free environment, ideally at 75°F to 78°F (24°C to 25°C). By Day 7, your starter should be bubbly, active, and nearly double in size after feeding. Consistency is key; stick to the schedule to ensure your starter becomes robust and ready for baking. Patience is essential, as the starter may take a few days to show signs of life, such as a tangy aroma and visible fermentation.
Transitioning to Long-Term Care
Once your sourdough starter is active and robust, it’s time to transition to long-term care. This involves adjusting the feeding schedule and storage method to maintain its health. For consistent use, feed your starter once a week, using equal parts flour and water. If you plan to bake less frequently, store it in the refrigerator, where it will slow down fermentation. Before refrigeration, feed it with a slightly higher flour-to-water ratio to make it thicker and more concentrated. Always store it in a clean, airtight container, such as glass or ceramic, avoiding metal. Allow the starter to come to room temperature before feeding when you’re ready to bake again. Regular maintenance ensures your starter remains healthy and ready for future baking adventures.
Troubleshooting Common Issues
Common issues with sourdough starters include too much liquid, mold, or slow activity. Solutions involve adjusting flour-water ratios, discarding moldy portions, and ensuring proper feeding schedules.
Common Problems During Starter Creation
During sourdough starter creation, common issues include excessive liquid, mold growth, or slow activity. These problems often arise from improper flour-to-water ratios, contaminated environments, or insufficient feeding. If the starter becomes too runny, reduce the water amount. Mold indicates the need to discard the affected portion and sanitize the container. Slow activity may result from using the wrong flour type or inadequate feeding schedules. To address these, ensure consistent feeding, use filtered water, and maintain a clean environment. Monitoring temperature and hydration levels is also crucial for a healthy starter. Regularly discarding half the starter before feeding helps maintain balance and prevents over-fermentation. Patience and attention to detail are key to resolving these challenges and fostering a robust, active sourdough starter.
Solutions for a Healthy Starter
To ensure a healthy sourdough starter, maintain consistent feeding schedules and use filtered water to prevent contamination. If the starter becomes too runny, reduce the water amount slightly. Mold growth indicates the need to discard the affected portion and sanitize the container thoroughly. For slow activity, try switching to a higher-protein flour or ensuring the environment is warm enough. Regularly discarding half the starter before feeding helps maintain balance. Always use clean utensils and containers to avoid introducing harmful bacteria. If the starter is inactive, increase feeding frequency or allow it to rest at room temperature. Patience and attention to these details will help foster a robust, bubbly sourdough starter ready for baking.

Maintaining Your Sourdough Starter
Regular feeding, proper storage, and consistent care are essential for keeping your sourdough starter active and healthy. Use filtered water, maintain room temperature, and store it refrigerated for longevity.
Feeding and Refreshing Your Starter
Feeding your sourdough starter regularly is crucial for its health and activity. Typically, feed it once daily with equal parts of flour and water by weight. Start by discarding half of the starter to maintain a balanced ratio. Use filtered water and a mix of whole wheat or rye flour for optimal yeast and bacteria growth. For long-term care, store the starter in the refrigerator and feed it once a week. If you plan to bake frequently, keep it at room temperature and feed it daily. Always use fresh, high-quality ingredients to ensure your starter remains bubbly and vibrant. Consistency in feeding schedules will help your starter thrive and be ready for baking whenever needed.
Storage Options for Your Starter
Your sourdough starter can be stored in various ways depending on usage frequency. For active use, keep it at room temperature in a non-reactive container, feeding it daily. For less frequent use, store it in the refrigerator, feeding it once a week. To preserve it long-term, freeze it in an airtight container, thawing and feeding it when needed. Glass, crockery, or food-grade plastic containers are ideal. Always label and date your starter for easy tracking. Proper storage ensures your starter remains healthy and ready for baking. Consistent care will maintain its vitality and performance over time.
Reviving a Dormant Starter
If your sourdough starter has been inactive or stored for a long time, it can be revived with proper care. Start by discarding half of the starter and feeding it with equal parts of fresh flour and water. Use a high-protein flour, like bread flour, to stimulate activity. Repeat this feeding process daily, observing for signs of life such as bubbles or a slight expansion. If the starter was frozen, allow it to thaw at room temperature before feeding. Consistency is key—reviving a dormant starter may take a few days of regular feeding. Once it becomes bubbly and active, it’s ready to use in baking. Patience and persistence will bring your starter back to its healthy, vibrant state.
Using Your Sourdough Starter
Your sourdough starter is ready to use when it’s bubbly and active, typically a few hours after feeding. Use it in recipes for authentic sourdough bread and more.
When Your Starter is Ready to Use
Your sourdough starter is ready to use when it becomes bubbly, frothy, and nearly doubles in size after feeding. This typically occurs 4-6 hours after feeding, indicating peak activity. To confirm, perform the “float test”: drop a small amount of starter into water; if it floats, it’s ready. Use your starter in recipes when it’s most active for the best results. For baking, mix 1 part starter with flour and water to create dough, allowing time for fermentation. Experiment with sourdough bread, pancakes, or waffles for delicious outcomes. Always ensure your starter is fed and active before use for consistent results in your recipes.
Tips for Baking with Your Starter
Tips for Baking with Your Starter
For successful sourdough baking, patience is key. Always use your starter when it’s most active, typically 4-6 hours after feeding. Plan ahead with a baking timeline to ensure your starter is at peak activity. Experiment with recipes like sourdough bread, pancakes, or waffles for variety. Maintain a consistent room temperature (around 75°F/24°C) to promote even fermentation. Avoid overmixing dough, as it can disrupt the starter’s natural activity. Store unused starter in the fridge and refresh it before use. Keep a backup starter for emergencies and share extra with friends. Regular feeding ensures your starter remains healthy and robust for consistent baking results. With practice, you’ll master the art of sourdough and enjoy the rewards of homemade bread.